
To calculate needed trailer capacity, calculate the total weight including the boat, engine(s), a full fuel tank (approximately 7lbs per gallon, full water...
Read More
|
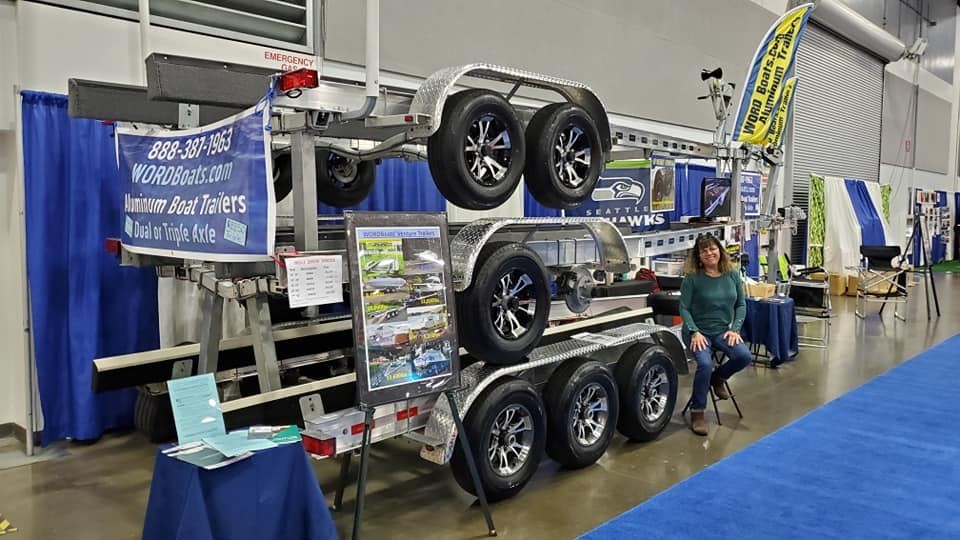
WORD Boats Trailer Sales You're going to like the way your boat looks and the safety and security you feel. |
Text/Call: 888-387-1963 Email: sandy@wordboats.com |
Trailering Help and More
How to Fit Your Boat to a New Trailer By: Sandy Williamson
https://youtu.be/UQOmAaDmwaI Link to YOU TUBE Video
Instructions for fitting a boat to a new Venture Aluminum Bunk Trailer:
-
Make sure your tow vehicle has the right ball size [2" for singles and small tandems.
2-5/16" for tandems over 6,000 # boat load capacity and all triple axle trailers. Make sure your tow vehicle has capacity equal or greater than the weight of your boat with all tanks full and gear and the weight of the trailer [see website specs].
2. Make sure you have the right electrical connector and that all leads have power when the appropriate light or action is set on. Ideally you have a flat 5 connector if the trailer has standard surge-disk brakes or a round 1.5" dia. RV type 7 pin AND a 7:5 adapter you could buy at Wal-Mart or most auto parts stores. If you ordered your trailer with the optional EOH electric brake controller to operate the hydraulic disk brakes, you need a round 1.5" dia. RV type 7 pin connector on the tow vehicle and an in-cab controller, either factory built-in or aftermarket about $100 and usually just plugs into the harness under the dash.
If you have surge brakes and only a flat 4 connector, you will be fine for most towing situations. If you have to back up either uphill or where there are speed bumps or large potholes, you will need to put the pin in the 2nd hole behind the ball to disable your trailer brakes. Disk brakes work just as efficiently in reverse as forward, so if the flat 5 connector is fully connected to your car’s 7 round connector, when you shift to reverse, there is a solenoid [electric switch] which will be energized and disable the brakes. Drum brakes on a boat trailer usually do not work and if they do, they don’t work effectively in reverse, hence no need for this solenoid and wiring.
3. Measure your boat from the bow eye to the transom. This is the bow eye-transom length.
4. Make sure bow stop is as far forward as possible so that it won’t interfere with setting the boat on the trailer to get the tongue weight its appropriate 7-10% of the total weight.
5. Make sure the target bunks are set to the lowest setting by loosening the set screws so they are mostly out of the way for the first time pick up.
6. The main bunks will likely not have to be moved, unless they are set where they would rest on something like a water pickup or hull transducer, or right at the point of a longitudinal stringer or angle on the boat bottom. If so move them in towards or away from the center of the trailer the minimum movement necessary to clear. Generally set the main bunks wider, not narrower, for best lateral stability.
7. Back your trailer on the hopefully steepest ramp you can easily use so the target bunks are just barely sticking out of the water. This position is several feet further up the ramp than when you launched and floated your boat off the trailer.
8. Put the boat on the trailer in contact with the target bunks. Release out enough winch line to hook it up. Put the winch in low gear by moving the turning handle axle so the little gear on it makes contact with the gear nearest the handle, to make it easy to turn the winch handle.
9. Do not winch it all the way up to the bow eye as you left over a foot to spare. You can reduce or eliminate repeating steps 9-11 by:
a. if your boat is already on its old trailer and the tongue weight/balance is good, put tape on the boat over the center of the center axle on triple axle trailers or right between the axles if tandem.
b. if 9a is not possible, google search “boat make model” and ‘trailer’ then click on ‘images’ to just see pictures of your boat model on a trailer. Note on the picture that part of the boat that is over the center of axles above, like a letter of the boat name or the edge of a window or some part. Use this point to load your boat on the new trailer centered on the axle set center.
10. Pull the boat far enough out of the water to measure where the transom is compared to the back of the bunk. For rear engine power boats, mostly the boat can hang off the back bunks a little allowing for a strap from a hoist to pick up the boat a little, put blocks in further up and move the strap forward to a safe location for the lift. The transom of your boat may hang off the end of the bunks 1-12 inches.
11. Move the boat up to flat ground. Check the approximate tongue weight by blocking tires on trailer and completely unhooking trailer ball connector. Measure how much the hitch on the car moves up or down when removing or adding the tongue weight of the trailer. If the tow vehicle is appropriately matched with the boat and trailer weight, this ‘squat’ distance should be about 2 in. Turn the tongue jack and feel the pressure. It should be hard to turn and much harder than before but not difficult for two hands. Better to have too much tongue weight than not enough. You may have to repeat steps 7-11 to get the tongue weight about right. You can estimate tongue weight 3 ways: 1. Put several guys on the bumper of your truck and measure the squat distance, and then you can prorate to the squat distance. 1. Weigh with a truck scale separately the tongue jack and the axles. Or 3. Weight with a bathroom scale and a wood lever to reduce the weight on the scale to 1/3 or ¼ of the tongue weight. Soo slideshow on my website.
Correct Tongue weight is way more important than overhang at the back of the bunks. If too light your trailer will sway side to side at high speed. It is ever does this, do not hit your brakes; instead gently release power to slow down very gently. Correct tongue weight is about 10% of total for small trailers down to 6-7% for our biggest. So for Venture tandems and triples, it should be about 500 to 1200#. The empty tongue weight is likely about 200-250#
12. Move the bow stop and winch stand back and up or down so the bow roller is touching the boat with the bow eye just behind and below the bow roller and the winch strap is horizontal.
13. Attach transom straps. Tighten winch and attach safety chain to bow eye.
14. Drive slowly [under 55 or 50] home
15. You can accurately weigh the tongue weight by using a 4 ft. 4x4, pile of blocks and a bathroom scale. Set a pile of blocks to 4 inches below tongue height, and 12 inches center to center to one side of tongue. Put the scale with blocks on top of it 3 feet opposite the other pile of blocks. This leverage will mean your bathroom scale will read 1/4 of the tongue weight, so if the bath scale says 200, the tongue weight is 800. See trailering PowerPoint download on my web site to see a diagram of this.
16. Adjust target bunks up snug to the hull. The target bunks carry very little load while trailering. Their primary purpose is when putting your boat back on the trailer; they guide the bow towards the bow stop. Their secondary purpose is reducing fore-aft rocking of the boat while on the road, as the aluminum I-beams flex more than the steel counterpart. This flex is not only not bad; it is good to cushion the blows of road bumps to your boat.
17. Re-Tighten all bolts you have adjusted and wheel lug nuts after ten miles of towing, but before you get on the freeway. 100 ft-lbs is about what the average man can do with a lug wrench.
18. Have fun boating. Remember the tip when picking up your boat to have the trailer further up the ramp than you do when you launch. Winching your boat several feet to the bow eye will results in a better centered boat and less load on the tow strap when you pull out and the boat will be right up to the bow eye. If you put the trailer all the way out and put the boat on it, when you pull out there will be a gap between the bow eye and the bow roller which is UNSAFE for two reasons-- the tongue weight will be too low making the boat and trailer sway at speed. If you have a panic stop or have an accident hitting something in front of you, the boat will slide forward and may cause damage due to the momentum it has built up moving before it hits the bow stop. The bow stop is designed to keep the boat stopped in its position only if the boat is not moving on the trailer when it hits the stop.
Feel free to call me from the boat ramp while fitting if you have any questions. Sandy 888-387-1963 or 877-979-8982 revised 11-11-21
What to bring with you when you pick up your trailer
Ball Size: All trailers at 6000 boat capacity or less use a 2 inch ball
All trailers at 7000 boat capacity and up use a 2 5/16th inch ball
Ball Height: 14 in tires require 20-21 inches top of ball to ground
15 in tires require 22-23 inches top of ball to ground
16 in tires require 23 inches
(some cases may require you reversing your receiver and placing ball on top to achieve height)
Light Connections:
Surge disc brakes are a 5 flat, like most common flat 4 with an added prong = 5th wire activated by reverse lights to shut off brakes when backing. Most newer vehicles with tow package come with a 7 round which has a reverse wire in it, therefore, a 7 to 5 adapter is used, or you can wire a 5 flat. The 5th, going to reverse wiring is usually a light blue wire in your harness. Adapters can be purchase from us or found at local marine or hitch stores. Let us know before pick up or delivery if you need one.
Electric Brakes require a 7 pole round plug like most new vehicles come with for RVs
To Tighten Lug Nuts:
For your trip home, bring 13/16 in lug or torque wrench to torque lug nuts after the boat is on trailer and rolling a few miles, but before getting on freeway. If trailer model is commander series 6000 or 8800, wrench must be thin walled to fit in the lug nut holes.
Best Brake Controller Options
Today we're going to be taking a look at the different types of brake controllers available and help you to determine which one might best suit your needs. Now, brake controllers are important because this is what sends power beck to the brakes on our trailer, and helps us to stop safely and also stay in compliance with state laws. So, without a brake controller, even a controller with brakes is gonna have no power. The first decision we're going to make in our brake controller selection is gonna be whether we want to go with something that's time delayed, like the Curt Venturer here, or something that is proportional, which would be like our Prodigy P3, or Prodigy RF, or our Hopkins Insight. Now, the main difference between our time delayed type controller and our proportional type controller is how they activate the brakes on our trailer. A time delayed system is gonna have a certain amount of time in which this brake controller is gonna go from zero power output up to whatever your maximum power output is. That's the way it is every time you brake. Now, with our proportional system, these have internal sensors. These can sense the negative acceleration or the deceleration of our vehicle and apply the appropriate braking output out to our trailer. This is gonna give us a more fine-tuned braking experience, so if we're slowly coming up to a stop we'll have light braking power.
If we need that more emergency braking or we really slam on the brakes, we're gonna get the additional braking power. It's going to get to the maximum much more quickly. Now whether you choose the time delayed or the proportional, they're both gonna allow some fine tuning of the braking power and the braking intensity, your quickness. The first adjustment that we're gonna have on brake controllers is gonna be the gain, and that's essentially gonna be how much braking power is gonna go back to our brakes. They're easily adjustable up and down. Now, the second adjustments that we see with brake controllers are gonna be kind of the fine-tuned settings. Now, in some of our time delayed systems they're gonna have what's called a sync setting. That sync setting is gonna determine how long it takes to get from zero braking power to the maximum that we have set. Now, the proportional systems are gonna have something very similar--it's not exact, but similar.
What they call is typically a boost mode. Now, the boost mode is gonna boost the initial braking. These don't have a certain amount of time that they're gonna take to get to maximum power. That's not how they work; they use the accelerometer or the sensor. What does happen, however though is if we go from, let's say, boost to zero up to boost one, when our brake controller initially comes on, it's gonna come on at about 13%.
We go to boost two, it's gonna come on around 25%. So we're getting a little bit of boost at the beginning to raise that braking power up just slightly so as our trailers get heavier we can increase our boost or we can increase our sync to help get more braking power more quickly. Now, we're also gonna have a slight variation in the mounting positions that we can use from controller to controller. The time delayed brake controller really can be mounted in any position, in any orientation: upside-down, sideways. But it's a very good idea to always keep your manual operation lever handy, so if you have a splay situation, you can get that under control. Our proportional brake controllers will have a slight variance on which way we can mount them--up and down in the front. Some are 90 degrees, some will go like the P3 here.
This you can mount 360 degrees, but it needs to be mounted in direction with the line of travel of the vehicle. That's how our sensors are gonna work--they need to be traveling the direction the vehicle is traveling, and then when our deceleration occurs, they sense that. Now, another benefit to the proportional brake controller is that during prolonged stops, this is actually going to reduce the amount of power being sent to our brakes, so we reduce overheating. With the time delayed style, as long as you sit stopped it's gonna be delivering maximum power to your braking magnets. They both have built-in safeguards, however, that will protect against any kind of shorts, and also it will let you know if your trailer becomes disconnected. Now let's talk about where each brake controller's gonna be best suited. With the time delayed systems, I think these are gonna be best suited for the really custom installations where you can turn them on its side, or upside-down, but keep in mind you really need to be able to get to this manual override lever. These are also gonna work out for the most cost-effective way of just meeting minimum state requirements. Now the proportional type controller would definitely be the controller that I chose to go on my vehicle of any type. This gives us a more customized braking feel for each different braking situation. It senses what kind of power we need and delivers it. We're not relying on time delayed system to slowly get us up to the braking power we need, especially in those emergencies. Now, this one's gonna be very well suited for truck applications. This is gonna be really good for the larger SUVs. This is gonna be mounted on the dashboard, so you have to make sure you've got enough space and you're got enough room so you're not gonna be bumping into it when you're- with your knees, when you get in and out. Now, when we get into our smaller SUVs, when we get into the limited dashboard areas for mounting, that's where our alternative-style Hopkins Insight's gonna work out really well. This, which acts as the brake controller itself, is gonna be mounted on the kick panel or on the center console. It has to be mounted in direction with the line of travel, but that can be down and out of the way. We then plug our flex display into it. This is gonna give us a reading and percentage of braking power. That can be easier to understand for some folks. And we've got our flex control, which just like the other controller, it allows us for our gain adjustment. Has a manual override lever, and has a boost control. Now, this is gonna allow us to just mount this and this, where it can be visible. The wiring in our controller can be hidden down behind the dash. Now, we can talk about our Prodigy RF and where it's gonna be applicable. Now, this is gonna be the perfect solution for a company that has maybe three or four trailers but hauls with 50 different trucks. All the truck's gonna have to have is a working 7-way connection on it. It doesn't have to have brake controller signal; it just needs 12-volt power, left turn and brake, and right turn and brake. It's all we need to do, and then this just gets plugged into the dash. So, this is gonna stay with the trailer. Our trailer plug goes in right here, and this is gonna get plugged into the truck. This'll be mounted on the tongue. Plug this into the dash and this is gonna give you your manual override button, right here. It's gonna give you full gain adjustment here on the side, just like we've got with our others, and the boost control. It's gonna be right here on top, so all the same functions that we had with both of our other proportional brake controllers. This is also gonna be ideal for the situations in which we have complex, multiplex wiring inside of our vehicles. Some vehicles just don't provide a usable brake light signal on the cold side of the brake light switch, which is gonna be required for both the other proportionals and also for the time delayed system. And this is also gonna be for the person that doesn't really want to touch any of the wiring in his vehicle. If you don't want to tap into the cold side of the brake light switch, if you're not comfortable in doing that you're gonna be heading down the road with proper braking force. You're gonna meet all of your state requirements, and this is gonna work exactly like a standard brake controller would. Now let's do a quick summary. When it comes to smart braking, our brake controller's ability to sense what the vehicle's doing and match it, that is gonna be a win for the proportional style controllers. Now, the ease of installation or there not being any need to tap into our vehicle's wiring--that's gonna go to the Prodigy RF. Now, when it comes to having versatile mounting options, your time delayed system or the proportional Insight are gonna be better. When it comes to compact design or the system not taking up a whole lot of room on your dashboard, the Insight is going to be the winner there. However, some of the time delayed systems are pretty compact. That's gonna complete our look at the different types of brake controllers available. We hope you find this helpful in selecting which one's gonna be the best for your application.
For More Information click this link.
Explanation of Bunks
The two boards up front (we call target bunks) pivot to the angle of your bow to catch the bow and point it to the bow roller on the winch post.
The back bunks are vertical for stiffness and full length support. If they were on their side the would only support the boat at the metal cross members. This way they cross every major bulkhead in the boat which transfer deck loads to the hull. All the major manufacturers use this style now.
Budget-Friendly Tips for an Amazing Outdoor Adventure
Budget-Friendly Tips for an Amazing Outdoor Adventure
The pandemic may have forced you to cancel your travel plans, but you can still get out of town
for some fun in the great outdoors! Whether it’s camping, hiking, biking, or boating, venturing
into the wilderness is a great way to lend a sense of adventure to your holidays—without
breaking social distancing recommendations or draining your savings. If you’re new to
vacationing in the wild, make sure you’re prepared! Keep reading for several great tips to
ensure your first outdoor adventure is both fun and safe.
Choose Your Adventure
Not sure what to do? You’re in luck! There are plenty of natural areas to be explored around
Tacoma. In fact, Washington State boasts millions of acres of protected wilderness, thousands
of miles of hiking and biking trails, and several scenic boating destinations. There are activities
out there for people on any budget!
If you want to spend your vacation on the water, boating is an excellent option. You could take a
canoe to a nearby lake for some fishing, embark on a kayak to a backcountry camping spot, or
grab some friends and rent a speedboat for a day of waterskiing. You could even save some
money and build your own boat! Whatever adventure sounds best to you, make sure you take
the proper safety precautions before heading out. If you need a trailer for your boat, be sure to
head over to WORD Boats for quality trailers at affordable prices!
Keep it Pet-Friendly
Don’t leave your furry friends out of the fun! Taking your dog along on a wilderness excursion
can be a very enjoyable experience—as long as you have the supplies you need to keep your
pup safe and comfortable. Bring a short and a long leash so you can alternate between the two
as needed, a water-resistant dog bed, food and water bowls, and a car carrier to keep your dog
contained en route to your destination. And if you’re taking your dog on a boat, get them a life
jacket! You can save money on all of these purchases by shopping from retailers like PetSmart
or Chewy. If you want to stretch your budget even further, look around online for Chewy
coupons before shopping.
Pack the Right Grub
No outdoor adventure is complete without good food and drinks. If you’re going to be doing a lot
of physical activity on your trip, bring nutritious snacks that will keep you energized and alert.
Oatmeal, beef jerky, canned tuna, peanut butter, trail mix, and granola are great budget-friendly
snack options. Car campers have a little more flexibility when it comes to meals. For example,
you could bring hot dogs to roast over an open fire or eggs and cheese for a melty breakfast
sandwich. Don’t be afraid to get creative!
Do Your Homework
Before heading out into the wilderness for the first time, do your research! This is important
whether you’ll be car camping in a designated campground, kayaking on a local lake, or
venturing into the backcountry with nothing but a backpack. Be prepared for any weather, even
if the forecast is predicting full sun. Bring a physical map of the area, a compass, a flashlight,
bear spray, a knife, matches, and a first-aid kit. Be sure to also research fire restrictions,
camping permits, and any other protocols you need to follow to avoid fines.
Don’t let the pandemic spoil your vacation. Stay close to home and enjoy all of the great outdoor
adventures that the beautiful state of Washington has to offer! As long as you’re properly
prepared before venturing out, you’re bound to have a blast.
Find quality boat trailers for a fair price at WORD Boats! Call 888-387-1963
Articles
-
Things To Know Before You Get Your New Trailer
IF YOU DON’T READ THIS, WE ARE NOT RESPONSIBLE. ALSO SEE TRAILER FITTING INSTRUCTIONS ON WEB SITE Deposits by Cash, cleared check, VISA/MC...
Read More -
How to Fit Your Boat to a New Trailer
YOU TUBE LINK TO VIDEO HOW TO FIT YOUR TRAILER https://www.youtube.com/watch?v=UQOmAaDmwaI HOW TO FIT YOUR NEW TRAILER TO YOUR...
Read More -
Why Aluminum Trailers?
Why Aluminum ? They are the best and at my prices why settle for galvanized? Aluminum is the most common boat trailer in the east but not yet common in...
Read More -
Bio from 2012-2021 Seattle Boat Show Trailering Presentations
—Trailer boater, both power and sail for 50+ years —Owned 25 trailerable boats, 14-28 ft —50k miles towed – Two 5k trips, Ten 2k...
Read More
Super Lube

(18KB)
Vortex Documents

(723KB)

(420KB)

© 2021 All information in this site is deemed reliable but is not guaranteed and is subject to change | Powered by vFlyer Website Builder